
Introduction to my learners blog
Throughout this blog is all of my learning outcomes and how I got to my final points within a project, there will be evidence of many obstacles and how I managed to overcome it.
Digital Environment:
I learnt a lot in this project but mainly what I learnt was how to use Maya properly, before this project I was very nervous and somewhat feared Maya and now I feel as though i'm slightly more confident with maya, in fact its probably my most used programme now, i've learnt how to model and texture to a respectable standard, i've also learnt how to use the camera in maya properly, the main problem with this project I found was time keeping I found that after the christmas holidays we just completely lacked in motivation, including myself, this was incredibly disappointing as we started off with such a great attitude, I really enjoyed doing my blog as well I felt it helped me learn how to get my ideas down and it also helped me when I lost my chain of thought because then I could just look a my blog and realise where I'm going wrong and where I need to get to.
Industry exercise 1-Character Design:
In character design I managed to overcome my fear of rigging, I didn't however create the perfect rig but for me the fact that I attempted something that I would probably never get round to doing n my own, I think is pretty impressive. This project was also good because before hand I modelled very cubic sort of shapes such as lighthouses,chairs etc but in this project I was creating a character with a very organic sort of shape, this was very difficult and I never realised it would be so hard to do!
Industry exercise 2 Tutorial
Out of all the projects this for me was the least helpful, the only thing I can say I found useful was the fact that I did a tutorial on quadrupedal walk cycle which I didn't know how to do but now I managed to get the basics down, this project also put into perspective the time and effort it takes to create a tutorial, being descriptive is key, and having the skill to observe is something I feel that I have lacked in previous projects which I hope I have managed to do well in this project.
Post Production
I found this project very interesting and I enjoyed it at times but I think the problem was that we were forced into making a decision of an idea quickly as we never really all sat down and spoke about it, in this project I guess i could say that I learnt that sharing ideas as a team is absolutely vital, I felt there were better ideas for this project that we could've used but all didnt completely agree on, the main thing I learnt though was how to motion track, this is a tedious part of the project but once you get it down its actually fairly straight forward, I also managed to properly understand how to use the graph editor in maya for a change, this is going to make character animation so much easier and so much more fluid looking.
In conclusion, all the projects shown below have helped me a lot and I feel that if I hadn't enrolled on this course and done these projects I probably would never get round to doing these things myself I also don't think id be able to understand these things myself without the tutors walking me through in formatives etc
INDUSTRY EXCERSISES-CHARACTER DESIGN
For my industry excersise brief i have chosen character design because its something that has always interested me and and its what i want to do for a career, i also found that the description of the characters in this brief had a lot of potential to grow and become something rather interesting!
Another reason i would like to do character design is that because of programme complications in the past with maya i have not really had the best chance to model and rig and i think its something i need to get good at especially when i go for a job in the industry!
I also think it would be amazing to have my own character made into a model.......< br>
What i want to achieve is something less obvious and something that only i can think of and create which is going to take a lot of my creativity but why not give it a go...
The character i have chosen for this project is "Wee Eck McGlone" because for me it sounded like the most fun and the most potential, i think its going to be hard finding a way of not making this stereotypical but im willing to give it a try, the description on the brief of this character is "“London Zoo’s long suffering head keeper sixty, bald, curmudgeonly, Scottish, fiercely patriotic and obsessive about sweeping up dung.”


[FIRST CONCEPTS SCANNED UP ON HERE]!!!!!!!
I found that these sketches of the character were far to stereotypical and that it seems i am so focused on the requests that the brief WANT us to put in than i am in what they HAVENT put in, and i think thats the angle i got to look at if i want to create something truly original!LESS OF THIS:


Right, Trying again!


MAYA TUTORIAL-Using the Expression Editor
Today (Wednesday 3rd November) we was taught the importance of scripting in maya, sending commands in code form to tell an object to do a certain thing, this can be useful for things like if im animating a car and i want the wheels to rotate in a constant and fluent manner or if i want to animate a propeller on a helicopter, the Expression editor ensures that your object moves to the exact specifications of your equation.For Example

http://www.youtube.com/watch?v=-zGTeZKt1qU&feature=player_embedded
Week 3:
This week i am hoping to do a lot more research and worm on this project than the previous weeks as i feel as though im slipping on this part of the course, lately, my main concern has been the team excersises with Jared and although ive enjoyed both projects equally, my time planning for the projects haven't been great. This week im hoping to do an execeedingly large amount of research maybe some research on the components of a hoover, for my characters foot, maybe some research on how the hoover operates itself? and most importantly by the end of the week i am hoping to atleast be mid-way through my character modelling!
The Hoover:
Alas i have come to a boring part of this project, in choosing the character i thought was the best, (image below) i came to the conclusion that i would have to research hoovers....HOOORAYYY!! although this seems like its the most annoyingly stupid thing to research i think its essential to my characters design stages, so lets get this over with!!


Beginning The Modelling Process:
First off, i have to map out my character in maya so i can get the shape and proportions exact! so the first stage would be to create a front and side view in the T-pose so that we can import this onto an image plane! The front and side poses are shown below.


First stage of modelling:


This is the beginning stages of my modelling process, so far so good....for an amateur , its taking me a while to work out all the little kinks, but if i flick through enough tutorials i think i can get this model looking pretty decent by the end of next week :)
Week 4:Okay so yet again week 3 was pretty slow, but my blog seems to be taking shape and so does my model, its the first day of the week (Monday 15th November) and i have the day off of college so i've decided to continue with a bit more of my modelling and maybe move onto Jared unit a little later,
Making progress... 


Kierons suggestions were that i make my layout more neat and that i show more progression, as you can see i've just changed my layout and showed a lot more pictures and annotated a lot more in what im doing, i valued Kierons advice because it does'nt only apply to this project but also to my future career and the future of this blog, if its not clear to some people than it might not be clear to others and that could cost me heavily when looking for a job in industry.

Russell's advice wasn't really critical, and he gave me a pretty generous mark, although i am not complaining i would much rather have a harsh critic than a nice one, the only advice he gave to me was to do more tutorials and upload them to the blog both students gave me a B but im still gonna work as though I've been predicted a U :)


RIGGED:
Okay so this was my first attempt at rigging EVER and to my amazement it actually went rather well, alex only asked for a basic skeletal structure just so we can put it in a pose, so i looked online for some tutorials and managed to find one which guided me through!
http://www.wonderhowto.com/how-to-rig-character-maya-for-beginners-196606/
Okay so here is my outcome, the character moves but only basic!
so yeah, this is the rig of my character, nothing special! but it works so i'm happy!
STRIKING A POSE:
A basic pose to show the rigging was successful and to make things more interesting for the 3-d printer!


i like this pose because its the sought of pose an old man would have, his back is slightly arched, and his arms aren't relaxed all the way down, he looks stiff which is what old men generally look like!
netfabb is a programme in which you can import your model as an .obj file and correct any problems and alter the specifications of your model to make it look good as a 3-d model!

This is what my character looks like when uploaded as an .obj in Netfabb i'm assuming that the pyramid is in fact what the model will be made out of, the red parts are the problem, i've had word that the netfabb website has a correction programme which will correct everything for you so as time is of the essence i am going to do that and then i can begin texturing!

so this is on the website and you upload you .obj to this part
and then with any luck......

BINGO! and you can download this file and send it away to the 3-d printer guy!
i will upload a photo when my figure is printed CANT WAIT!
LETS GET TEXTURING!
Okay this was probably the hardest part for me, finding textures that didn't look flat was a task, below is my final result, i tried my best and i don't think its completely bad, but if this part of the project has told me anything its how difficult it is to texture, its one of those things thats essential to go back to!


Okay so as i previously said, my texturing isn't great, i tried to do as much as possible but some things such as the hoover just looked better if i added a standard lambert or blinn i don't know weather or not we're aloud to do that but fingers crossed!
MAKING THE MODEL LOOK LIKE CLAY:
I actually did this before the previous texture (above) however, ialso had difficulties with this texture, i did want to make fingerprints and creases and really give it that clay effect, but it did turn out to look rather inaccurate, i did try my best but time is too short, this is something im going to have to go back to or it will drive me up the wall! so here is my final result for the clay:


These are my final clay models i gotta say when i was texturing it i thought it looked a lot worse but i think its not bad, it looks like if i were to make a model out of clay haha!
but im still gonna go back and attempt to texture this a lot better! now just waiting for that figure to be printed!
turn tables of my character:
There not that clear as the camera had to be really far back to get the whole model in shot but hopefully you can see clearly on the pictures!
PROBLEM
I spoke to jake durrant (3-d printing guy) and he told me that he's been really busy so it will be a while before i get my model, i sent it last thursday and he said hes going to try and look at doing it later today (deadline day) i should have been more organised i thought friday would've been fine but now maybe it will teach me a lesson that i shouldn't assume things so close to deadlines!

Finally after weeks of trying my model has been printed :D unfortunately there mut have been something wrong with my characters body so instead i ended up printing the head! heres a video of what my head looks like!
http://www.youtube.com/watch?v=2u2pNB4I3gQ&feature=player_embedded
ENVIRONMENTS PROJECT
Went back to college this week and have just been informed that my project for this term will be environments it was daunting at first but when i started thinking about it, technically everything is an environment of some sort so its a very loose project, narrowing it down may be challenging and coming up with the best possible idea is going to be a challenge considering the time we have, a lot of research is key for this project!My group:
Josh Coldham
Gareth Peck
Sarah Piedot
Callum Dallimore
In terms of groups i think i've been very lucky i've worked with a few of these before and am looking forward to sharing ideas as i feel the people in our group are open and creative enough to come up with some pretty interesting ideas!


Today i found a great environments video by complete accident my brother was trying to show me george lucas' first film "THX 1138" before i checked that out i remembered that lucas' sound company was called "THX" and as my brother is doing a sound design course i thought id show him the video i found was actually more helpful to me than it was to him...
http://www.youtube.com/watch?v=qwyHJg8t8B4&feature=player_embedded
what i liked about this video was how the natural environment worked with the sound to make a musical piece, what i also like is the visuals look quite natural but the sound suggests its quite technological in terms of machinery and stuff.
Week 2:
The first week of my environment project was pretty slow if im honest, getting back into the swing of things was a challenge but the biggest problem was researching, i had great difficulty in knowing what things to look for but hopefully it was just a block and it will pass. Also some good progress came out of today (Tuesday the 2nd of November) we have came up with a final concept for our environments project HOOORAAAYY! we have also come up with a team name "The Essential Mike Smith Appreciation Society" or as im going to call it on this blog for the purpose of being lazy (TEMSAS) with a name like that were definitely gonna get the grade ;)
Also Callum has very generously offered to be the producer of the group which is a huge responsibility lets hope he can handle it HAHA!!
Now enough of the little bits and bobs, now to the main thing THE CONCEPT IDEA.......
The Weather Maestro
The idea is pretty much about an inventor who creates a weather machine which is an organ and he plays the keys and each key has different weather consequences,this is set in a lighthouse which inside is actually more of a laboratory. the idea is still very early in its production so a proper story line is not definite, although we all decided that we wanted the music to interact with the animation, my brother is doing a sound design course so we've decided to work closely with him and his friend to get the desired outcome.The concept for this idea is organised chaos.
So during this week there is going to be a lot of conceptual and pre-production pieces,
especially the design of the lighthouse, maybe some experiments with texturing,lighting and what kind of colours we want to use. Research is essential this week, without the research then my conceptual stuff will be weak and i think an insight into the history of lighthouses and maybe even organs will just be worth researching and i also think looking at the mathematical theory behind organised chaos is worth going into, and maybe looking at why natural disasters happen? either way theres a lot of potential to develop this idea...
Shedding some light on lighthouses:

I managed to find this very informative website on lighthouses (www.seathelights.com)
and i thought what better way to start researching the lighthouse than to look at the anatomy of a lighthouse, i also thought that it would be good too look at so that we can get a basic idea of modelling the object, what I've noticed on this lighthouse is that it is very basic and the only things that are involved in the lighthouse are actually necessary so it may need to be taken under advisement that i need to incorporate all these into my design.
http://www.youtube.com/watch?v=H01EhsrQVZ8&feature=player_embedded
I also found this video on Youtube of a Lighthouse lens flash, i thought that this would be incredibly helpful when it comes to the lighting process of the project, maybe the lighthouse light could work well with the sound of the piece, like a disco? but then again, that could be considered, incredibly tacky!
I also managed to find this video (on youtube) of what the inside of a Lighthouse lens looks like!!
http://www.youtube.com/watch?v=QtxLd4dm9W4&feature=player_embedded
i thought it would be interesting to look at the mechanism inside the lens and the design because i thought it would be inspiring and the mechanical side of things just looks really fascinating!
So how does a Fresnel lens work?
The Fresnel lens reduces the amount of material required compared to a conventional spherical lens by breaking the lens into a set of concentric annular sections known as "Fresnel zones", which are theoretically limitless.
In the first (and largest) variations of the lens, each zone was actually a different prism. Though a Fresnel lens might look like a single piece of glass, closer examination reveals that it is many small pieces. It was not until modern computer-controlled milling equipment (CNC) could turn out large complex pieces that these lenses were manufactured from single pieces of glass.
For each of these zones, the overall thickness of the lens is decreased, effectively chopping the continuous surface of a standard lens into a set of surfaces of the same curvature, with discontinuities in steps between them. In fact a Fresnel lens can be regarded as an array of prisms positioned in a circular fashion, with steeper prisms on the edges and a near flat convex center.
Fresnel lens' design allows a substantial reduction in thickness (and thus weight and volume of material) of the lens, at the expense of reducing the imaging quality of the lens, which is why precise imaging applications such as photography still use conventional bulky (non-Fresnel) lenses.
Fresnel lenses are usually made of glass or plastic; their size varies from large (old historical lighthouses, meter size) to medium (book-reading aids, OHP viewgraph projectors) to small (TLR/SLR camera screens, micro-optics). In many cases they are very thin and flat, almost flexible, with thicknesses in the 3-5 millimeter range. (information taken from wikipedia)
Bell Rock lighthouse:

the reason i uploaded this photo was because i thought this lighthouse had a lot of history and because it was one of the first i think its good to look at how minimalist it is but the main reason i uploaded it was because it has a story behind it, and i think maybe it could be relevant to my team and myself, it could even be considered to be inspiring!!
Colossus of Rhodes:
FOG HORNS:
http://www.youtube.com/watch?v=2g8GKweFoNA&feature=player_embedded
last Wednesday Jared mentioned fog horns, fog horns allow the person in the light house to see what obsticles are in what direction because of the sound bouncing off of the object, this got me thinking that sound is very relevant to our project and maybe the sound and perhaps weather from our organ can come out of the fog horns!
Designs for lighthouses:


The Weather Machine:
Weather control is the act of manipulating or altering certain aspects of the environment to produce desirable changes in weather. Weather control can have the goal of preventing damaging weather, such as hurricanes or tornadoes, from occurring; of causing beneficial weather, such as rainfall in an area experiencing drought; or of provoking damaging weather against an enemy or rival, as a tactic of military or economic warfare. Weather modification in warfare has been banned by the United Nations.-wikipedia
I couldn't find much information on a weather machine because its just an idea/theory so i have to go on what i think it might look like or work like as apposed to fact!


I think this is my best idea because ive added a few other elements to it, on top of the keyboard is what is pretty much a fruit machine but instead of fruit its different weathers and depending on what it lands on depends on what the "Maestro"can play.
Modelling the Lighthouse
For Modelling the Lighthouse i wanted to start with the basics before i went technical, as im not exactly the best modeller but i felt it would be cool to check out modelling the basic shape of the lighthouse, so i just used various cubes and spheres to create them, i like them both in different ways but still think the actual idea need a lot of improvement!


Okay so today i finished my final lighthouse design, i think it looks pretty good in a very simple way, together as a group we decided to make the lighthouse clean looking and traditional as apposed to tatty or abstract, this is because looking at other groups they all seem to have gone for the tatty and rusty effect and we thought we better try something a bit different so that we can stand out!


thought id also give you a playblast to look at! :)
http://www.youtube.com/watch?v=M92bvPRk_jY&feature=player_embedded
Anyways after the modelling of the outside, i thought while sarah was working on the uv mapping and texturing id start on one of the inside rooms here are some concepts of my ideas i wanted to go for something that looked messy and untidy but had an old fashioned wooden cabin feel to it:


Okay so this is the basics of my room, i think it looks pretty decent so far although i think its still too early to tell, but texturing and a bit of colour will make this really stand out, HOWEVER, I have been told to do the animatic for this short film, and the narrative is more important right now, so i've sent this model around the group and seen if they can do anything to it while i work on the animatic....
HOWEVER HOWEVER, we also need to think about effects for weather such a rain and the sea etc, so i have asked josh if he would like to have a go at the animatic, josh is probably the strongest user in after effects so it seemed logical at the time, he agreed and is currently working on it now.

This is the Storyboard Callum did which i scanned in, i shall be e-mailing these to each group member but i uploaded it just to give an idea of what josh has to work with on the animatic its not a bad storyboard but theres a lot of gaps to fill in there.
Creating waves
I took the liberty of undertaking the challenge of making the waves in our environment, mostly because i thought it would be a useful thing to learn and i've always wondered how to do it so its more an act of curiosity, so i began with the standard google search of "creating waves in maya 2011" and after a few minutes of tedious skimming through i found a tutorial clear and simple enough for me to understand haha!
http://baselinefilms.wordpress.com/2009/12/06/creating-a-stormy-ocean-in-maya/
This is a link to the tutorial i followed
And here is the result of my first attempt:http://www.youtube.com/watch?v=z09xsVQ9xJo&feature=player_embedded
I think it turned out really well, at times i think it looks a tad plastic like, but for a first attempt you can clearly tell what it is and i think if i was to use it as a final piece it wouldn't look to ridiculous BUT that doesn't mean i'm gonna settle for it ;)Applying some fog maybe?
http://www.youtube.com/watch?v=pPEoHA0j-b8&feature=player_embedded
I think this looks okay for experimentation, however i don't think ill recommend using fog in our film i think it just makes things look dull and the fog effect looks pretty tacky.
I also added a camera to get a real feel of the motion in the waves
http://www.youtube.com/watch?v=DbSvYdgHfbY&feature=player_embedded


FOR F***K SAKE
http://www.youtube.com/watch?v=pPEoHA0j-b8&feature=player_embedded
I think this looks okay for experimentation, however i don't think ill recommend using fog in our film i think it just makes things look dull and the fog effect looks pretty tacky.
I also added a camera to get a real feel of the motion in the waves
http://www.youtube.com/watch?v=DbSvYdgHfbY&feature=player_embedded
Okay Modelling the character:
It seems callum didn't feel up to the challenge of modelling the character and decided he didn't want a character because we was running short on time, so ive taken it upon myself to save the day and start modelling the character so thats my job for a few days below is my progress:


Above is the beginning stages, i think this ironically is going better than my character design with alex's project haha i like the simplicity of it, although theres not much point in going in to detail just yet!

A PROBLEM HAS AROSE
for some reason, when i duplicated my mesh i got a rather ugly crack down the middle of it, THIS IS NOT PART OF THE MODEL, so ill report back when i sort the problem out.
Possibilities:
- My vertices could be crooked on the side
- i didn't merge the vertices together


Solved!!:
Turns outi stupidly didn't delete the faces on the side, but this stupid error just goes to show how much concentration is required when using maya, one small pathetic slip up can hold you back 20mins (thats right, TWENTY MINUTES).
FOR F***K SAKE
It seems after all my efforts in character modelling so far that Callum feels we should just not have a character in our environments project anyway due to the lack of time, this has ironically wasted my time and if im honest im pretty angry right now, but if this is what the majority of the group think is best then im just gonna have to go with it. However i personally think this could potentially slow us down EVERMORE SO as this means coming up with new storyboards and animatics, our whole project was based on this character reacting to the environment so i feel without the character this could potentially make our project very weak and there would have to be some pretty impressive texturing and modelling for us to get a decent grade. This whole predicament has put myself and others in a panic as to how well we are doing as a team in this project but we will just have to work harder.....should i continue modelling and rigging the character wasting more time if we dont use it? or should i keep it for experimentation and finish it hoping we change back to our original idea?....TBC
A calmer mood!
Having spoken to Jared he assured me that obviously environment is key and that is the biggest issue in the brief, i think being so caught up in this project made me lose sight of what the important thing is in the project and so I've messaged the guys (not exactly apologising as thats not my thing) but admitting that there right, if anything this has boosted my motivation for the project.
Creating Cogs:
Today we spoke altogether and decided that in a few of the rooms it would be cool to have some form of mechanism in the lighthouse perhaps maybe turning the Fresnel light so my next assignment for this project is to create some moving cogs, the cogs have to move constantly and in time so it would probably involve me entering some code, i've touched on entering equations before in my other project so hopefully this will be straightforward!
Modelling the Cogs- This was very straight forward just a matter of creating a circle and changing the subdivisions, and extruding the faces as cogs, below is my result!


so this is the basic model, were going for a dark rustic look so just a simple texture is needed.

This is the final outcome of the cogs, now all thats left is the coding which should be interesting, the most important thing is to keep them all in time with each other the small cogs have to work in half the time of the big cogs and they have to be exactly half the size so here goes....


EUREKA!!!THE EQUATION WORKS!
ALL DONE! these cogs only took a few hours and i think they look decent enough, i don't think theres going to be that big in the scene so its not really essential that its textured beautifully but at least it looks decent enough for the scene! PARTY ON.
http://www.youtube.com/watch?v=EppY5nmS7no&feature=player_embedded
HEAD IN THE CLOUDS:
Well after my fun few hours with the cogs it appears my next task is to create some clouds for the outside of the lighthouse, it seems towards the end of this project my task has been more towards the elemental side of things, what with waves etc, but i don't mind, as everything in this project can be used later on in life so its all worth while, so i googled some tutorials, there are several ways i can do it, i can import an image of clouds onto an image plane and merely position it (sounds like the most straight forward choice) or i can use another fluid effect like the ocean which seems like it looks more natural so im going to give that a go first!
his is a sky dome that sarah created for me to act as sought of a backdrop for my clouds, all it is is a dome shape with a simple sky texture, i would've done it myself but sarah offered and i was pretty busy researching into this cloud lark.
The clouds final result:

This is a rendered test of my cloud and i think its definitely good enough! i can change the transparency and the colour to change the mood of the weather, but its gonna look very effective once its all put together

this is what the final render looks like i think it looks pretty effective now for the camera's!
http://www.youtube.com/watch?v=NkmpYS_RjDU&feature=player_embedded
This is a quick animatic that josh managed to whip up, just to give us an idea of the sounds and camera angles we all need, its not the clearest animatic but we've all spoken to each other and have a strong idea of what were going to do!
http://www.youtube.com/watch?v=ntq_sXVFhnY&feature=player_embedded
This is the opening sequence that i have been working on, i like it a lot because of the swooping actions although it could be improved i feel time is of the essence and if theres time after i can tweak it up a bit, but there is another scene callum wanted to try out so thats what im doing next,
http://www.youtube.com/watch?v=KN8DYzYdTcg&feature=player_embedded
I think this scene was definitely worth doing as theres some really effective stuff, it looks dark and gloomy which gives it a style GOOD TIMES!
There are 4 more parts to be done by josh, sarah, callum and gareth but we all have put input into every aspect below is a list of things and a few screen shots to show who has done what:
Callum was the producer, he made sure that everything was all on track and organised, he also modelled the inside of the top of the lighthouse, this involved all of the furniture inside it such as the organ, the machines and the telescope etc. Gareth modelled the hallway of the lighthouse and also textured it he did a very good job with all the colours and lighting giving it a regal and old fashioned effect, i was very impressed with the camera work he used and i think its a highlight of our project, Josh modelled the small green room and did some basic texturing he took elements of other peoples work and imported it into his(the sofa the books etc) but the majority was done by him he did a great job texturing the floor and it really gave it that grotty effect, then there was sarah who arrived last into the group and approached us, we would not have been able to do it without her she has helped so much with the texturing of the lighthouse i modelled and the room Callum modelled, she also textured a room that i modelled in the early stages of the project which we decided not to use, sarah also was a huge part mentally for the group, keeping a cool head and helping everyone! i myself modelled the lighthouse the sofa's the first room you see at the beginning of the blog (which was never used) the cliffs and i also created the waves and the clouds, modelled and textured the cogs and created a character (which got taken out due to lack of time) we all did the camera parts to our scenes we were working on, my brother daniel cowell also helped with some sound files!
In conclusion to this project we started off great at the beginning and the motivation of the team was strong it was just after the christmas holidays we started to lose our heads and thats why the project might have been slightly rushed, better time keeping is essential if i am to pursue this as a career and less time on pre-production, what should have been done was a week of planning, a week of storyboard and the rest of the time working towards the final piece
Industry Exercise 2
A brief explanation of the brief:
So below are the excercises in this term and what percentage towards the grade they amount to:
Exercise 3 (Tutorial)-60% of grade
Exercise 2 (Production Schedule)-20% of grade
Individual Reflective Journal-20% of grade
Tutorial Exercise:
This exercise is the majority of the grade so obviously i'm gonna spend most of my time on this, whatever i choose to do a tutorial on, it must be technical and informative, i think if i can get someone with very little knowledge on the programme to successfully complete this tutorial then i have made it a success, another thing i was thinking about was to make something different, something we haven't seen in a tutorial before but to make things a bit easier, thats a long shot so i'm not going to dedicate my whole time to figuring out what that is but its something to think about! i also have to link it to alex's project (mixing live action and visual effects together) so i've got to think about what i can do there! above all i also want something that will be beneficial to my showreel and something that i will find useful in the future!
Production Schedule:
This is the online production schedule we are going to use a programme called "shotgun" basically what this exercise teaches us is organisation and its preparing us for meeting deadlines in industry, time keeping i feel personally has always been my weakness so this should be interesting! but if i get it done asap and keep on top of everything i SHOULD be fine! but its staying in the zone thats going to be the problem, the environments project started off brilliantly but after the christmas holidays myself and my group just lost focus.
Individual Reflective journal:
The reflective journal will be kept separately on another page on this blog, but this is pretty straight forward just to show what problems i've had, how i've overcome them and how i got where i am on my project etc this is the one i'm least worried about as i've had loads of practise with keeping a journal in previous projects so i know exactly how to do it!
I've thought long and hard about what tutorial i am going to be doing for this project, i wanted something that had enough information online so that i could research and look at the best approach, but also i wanted something that i could learn to do myself and discover my own easy methods, My original idea was to do camera splines (i chose to do this because i have no idea what it is!) however, researching this online had't shed any light on the subject! So then i decided to choose to do a tutorial on how to animate quadrupeds i've never actually animated a four legged animal and its something i should probably get used to doing if i want to pursue a career as a character animator!
So i thought i do some visual research, i thought youtube was a good place to start and maybe some analysis on why the animals are animated that way!
This Deer isnt the most fluid of animations i've seen but i'd say the actual movement is all there, i think its important to note that because its a deer its very elegant which is why the legs are so close together, there are more steps but they are smaller, whereas if the animal was something a bit larger and heavier the steps would be more distant and clumsy!
http://www.youtube.com/watch?feature=player_embedded&v=TWmOe2JggfoThis is the online production schedule we are going to use a programme called "shotgun" basically what this exercise teaches us is organisation and its preparing us for meeting deadlines in industry, time keeping i feel personally has always been my weakness so this should be interesting! but if i get it done asap and keep on top of everything i SHOULD be fine! but its staying in the zone thats going to be the problem, the environments project started off brilliantly but after the christmas holidays myself and my group just lost focus.
Individual Reflective journal:
The reflective journal will be kept separately on another page on this blog, but this is pretty straight forward just to show what problems i've had, how i've overcome them and how i got where i am on my project etc this is the one i'm least worried about as i've had loads of practise with keeping a journal in previous projects so i know exactly how to do it!
I've thought long and hard about what tutorial i am going to be doing for this project, i wanted something that had enough information online so that i could research and look at the best approach, but also i wanted something that i could learn to do myself and discover my own easy methods, My original idea was to do camera splines (i chose to do this because i have no idea what it is!) however, researching this online had't shed any light on the subject! So then i decided to choose to do a tutorial on how to animate quadrupeds i've never actually animated a four legged animal and its something i should probably get used to doing if i want to pursue a career as a character animator!
So i thought i do some visual research, i thought youtube was a good place to start and maybe some analysis on why the animals are animated that way!
This Deer isnt the most fluid of animations i've seen but i'd say the actual movement is all there, i think its important to note that because its a deer its very elegant which is why the legs are so close together, there are more steps but they are smaller, whereas if the animal was something a bit larger and heavier the steps would be more distant and clumsy!
The squirrel tends to jump more as apposed to actual running, as soon as the two front paws touch the floor, the back paws are sprung up into the air but its also important to not that when they both meet at the floor they are closed in!
http://www.youtube.com/watch?feature=player_embedded&v=TPb2YUzHr2A
Its well known in the animation world that a horses gallop is supposed to be one of the hardest things to animate, and you can see why, none of the legs touch the floor at the same time, if im to do a tutorial on a horse gallop there a big chance i'd go mad, but theres no denying it would look good on my showreel!
http://www.youtube.com/watch?v=gcWbON-vylU&feature=player_embedded
Okay!:
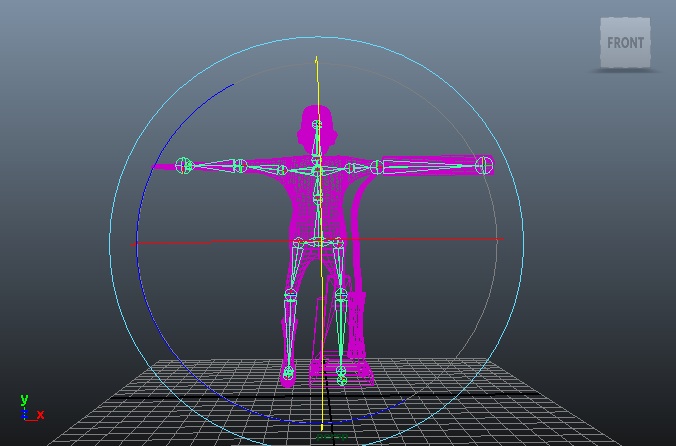
I think before i go any further i should try and find myself a good sturdy rig which would be simple enough so that anyone can understand it, including myself, i have to remember that i am doing a tutorial and what might seem simple to me may not be to others reading the tutorial, so it has to be as simple as possible!
There are loads of rigs on www.creativecrash.com but most of them are expensive and i'm assuming the people following my tutorial may not have money as well as myself! but unfortunately as far as free rigs go, there's hardly any, let alone a decent rig, so i've decided to use the Nico rig, the controls are fairly simple my only problem with the rig, which may cause complications with the people following the tutorial is that there's a lot of controls! but we don't necessarily have to use all of them and i could also draw up a diagram and label the controlls for the viewers to look at before the tutorial!


Okay so this is a recording of me playing with the controls, on the Nico rig, it was also a chance for me to try a new bit of software called "Ishowu" its software that allows you to record what your doing on the screen, unfortunately i couldn't find free recording software so this is a free trial hence the water mark! if i am going to use video for my tutorial then i think maybe i should think about an alternative free piece of software!
http://www.youtube.com/watch?v=eCKEAyC1N0U&feature=player_embedded
Soooo, when looking at this rig obviously because the character is made up we are going to have to compare it to other animals so that it looks natural and organic enough! i personally think he could potentially walk like a dog or lion! so thats what i'm going to look at now!
http://www.youtube.com/watch?v=X4tDR0bLtBo&feature=player_embedded
Notice how the lion walks by first moving his right back leg, and following with his front right leg, then his left back leg, and then his front left leg, this video will be easy to breakdown into easy steps for my tutorial
http://www.youtube.com/watch?v=FHkdAWdmyUc&feature=player_embedded
This lion is a lot heavier than the last one, most of the movement in this video comes from the shoulders and the head, but the legs also have a pattern, the two right legs move one slightly after the other, and then the left legs do the same.
I couldn't find any real decent footage of a dog walk so i found an animated dog walk which was easy to analyse but looked organic enough!
http://www.youtube.com/watch?v=Ojv0RZWF5y0&feature=player_embedded
the pattern in this walk is fairly sraight forward it goes front left leg,back right leg,front right leg, back left leg, its almost a diagonal pattern!
PLAN OF MY WALK CYCLE HERE!
Other peoples tutorials:
http://www.idleworm.com/how/anm/02w/walk1.shtml
This tutorial was just a standard walk cycle but i liked it because it was layered out very neatly and explained thoroughly, there are only a few short stages but its explained very well.
http://www.anticz.com/Walks.htm
this tutorial is very well explained but i found it very hard to stay focused, i think the colour and the layout kinda strained my eyes, although the description and explanation of the tutorial is key, obviously appearance has its effects on the reader
Problems i've had with this tutorial:
Personally i found it really hard to stay motivated when it came to writing this tutorial as it had its repetitive stages and i'd say thats been the big problem, i also had a problem with the Nico rig halfway through, the leg controls jumped every so often when trying to keyframe making it very hard to get the exact pose down, but that is no ones fault but my own as i obviously didn't check out the rig thoroughly enough, i had also personally hoped to create an original tutorial that would be very simple to follow and i felt as though i didn't quite capture that!
Today we received the brief for our post production and visual effects project, to be honest when first hearing about the project i thought it would be very boring and drawling however today in class we got shown the potential of what we can do when mixing visual effects and live action together, its also something to seriously consider as a career, as today we got told how much industry are always wanting visual effects artists!
I thought first id look at some videos on youtube to get inspired and to get a good idea of what to look at:DISCLAIMER-THESE VIDEO'S ARE FOUND ON YOUTUBE FROM THE LABELLED YOUTUBE USER, I DO NOT OWN THE RIGHTS OR HAVE ANY INVOLVEMENT IN THE VIDEOS BELOW.
property of CORRIDOR DIGITAL
http://www.youtube.com/watch?v=Oynn_pkEyAY&feature=player_embedded
below is the making of the video, showing you how they did all the effects
http://www.youtube.com/watch?v=o3gRIDmeRSM&feature=player_embedded
Okay its been a while since my last post but i had what many people call a "creative drought" nothing was coming to me at all, however me and the team finally managed to come up with a good enough idea which we think will look effective and also fun, since my last post the team had also recruited a new member Niko Sierra we think he will be a great asset to the team and help give us the motivation we evidently lacked in the first few weeks of the project.
THE IDEA:
So we went through a lot of ideas throughout the past few weeks but didn't think anything was really that solid, there had to be a storyline and it had to look effective but still we wanted to keep it as simple as possible so that we don't fall behind (IRONY). So the first idea we had was to shoot in a park and have animated creatures come out, this was pretty obvious and could easily look awful, so the second idea was a development of that idea and that was that we shot in front of a green screen and animated the WHOLE background, this sounded like it had some potential although there would be A LOT of messing around it also just didn;t even really sound that fun. Nikko had come up with an idea that we have to action figures fighting on a table which sounded like fun but the idea was a tad weak at first, so the team and i started coming up with ideas on how we could develop it, we then came up with an idea of chess with moving figures (similar too harry potter and the philosophers stone) but then we thought about maybe two teams of these figures fighting like a war game, we also knew that because of the lack of time we would have to use pre-modelled and rigged free characters so the obvious choices were the two most stable rigs that we are all familiar with, "The Goon", and "Moom" so thats our final idea, a war game of the battle of the rigs that is "Moom" and "The Goon", its going to have a lot of special effects such as gun shots, explosions and brick explosions (for when the character gets shot) were also going to have little touches such as a very annoying rig known as "Barry" with a flag through his head, for more a personal vendetta we've all had in the past with that rig! Because we felt that we needed to incorporate green screen and ourselves (as it is a live action thing) were going to film ourselves seperately on a green screen and have ourselves looking at the board game and interacting with it, we are all very motivated for this project now and expect good results towards the end :)
Okay so another change in ideas:
We have decided to do some effects on storytelling, the concept is pretty basic, all it is, is someone reading a book and his/her imagination spilling off the page but onto the table, the effects are gonna pop up like a pop-up book, maybe textured to be like card/paper! is a simple idea but we could have a lot of fun with it.
http://www.youtube.com/watch?v=Cg0yLiNSj6s&feature=player_embedded
This is the video we are using to composite special effects etc, i personally think it could do better, hopefully i can persuade the rest of the team to do the shoot again, i think it maybe needs to be closer to the book or table but so that the effects are really up close! so i think the next logical thing to do would be to research pop up books, to really get a feel of how it should be animated.
POP UP BOOKS!
I think pop up books are generally a good place to start because of the relevance that its a book and things are coming to life, that to me was the concept of the pop up book, and actually some look rather effective below is a few video's i found on youtube
http://www.youtube.com/watch?v=CLTCbzasLuE&feature=player_embedded
I think the thing i find interesting about this pop up book is the idea behind it, its a book on phobias and the general fact that its a pop up book to me really makes things all the more intimidating, i think the right format was used for the right reasons, but would it really work in a special effects scene coming from the table?
i think it would work effectively as a style, but if we were to use this style there could be the risk of feeling rather limited in textures and animation etc, on the plus side it could be very easily done,especially in terms of animating, there will be some interesting tools we can use in after effects that i myself would be interested in looking into.
I also stumbled across this very interesting pop up book "the wonderful wizard of oz" obviously a well known story but the reason this video caught my attention the most is the style, i think everything is done in such a cartoony way and the colours are beautifully put together, i think this video shows more of the potential of doing a pop up style effect in our short film compared to the other one which is why i posted it.
I thought maybe the next obvious step is to look at textures (if we were to do a pop up style) i think to keep it looking like paper would be a great style i found these pictures on the site linked below:http://www.zollberg.co.cc/paper-textures.html

i think something like these would look great, i'm more convinced that this would all look a lot better in after effects completely, i think that after effects has a massive range of plug-inns and tools that could be beneficial to our project, however, having had a word with the guys it seems gareth has started modelling in maya, this isn't really a problem as we can just use both, we are definitely going to be using after effects for the composition of our project!
Here is a rough texture i created for the potential dinosaur rig, i wanted to create a cardboard effect so using photoshop, i painted over a cardboard image i found on google, i chose to paint it a traditional green and add a few spots, i wanted it to look simple so that it looked like a child had made it!

OH MY GOD!
yeah apparently were using pop up looking effect but were not gonna have it textured like a pop up book like paper,cardboard etc but i don't mind, its just part of the idea process, things change all the time but i am promised that this is the final decision so im not complaining :)
So just a standard toy dinosaur it is then :)


I thought because we were looking at rather juvenile style for a dinosaur id look at a few images of some iconic dinosaurs that children love, the main one is obviously rex from toy story but all of them more or less have quite soft features and don't look intimidating at all, and i think thats what i should incorporate into my dinosaur!
Gareth gave me a model that he'd been working on for the dinosaur to texture but i felt that i hadn't contributed much to the group so i decided to model the dinosaur in more detail as Gareth hadn't spent much time on it!


These are screenshots of the model that Gareth created, i think i want to create something equally as simple looking but more that fits with the rest of the projects style, Callum's city scape is pretty intense and Gareth's octopus looks respectable enough, this dinosaur still looks pretty out of place, i wonder if i can create a simple model but a very good texture and get away with it! The guys reckon it should be a toy or a cardboard model that looks like a child created it!
ANIMATIC:
animatic by sarah piedot
http://www.youtube.com/watch?v=12tOhxFX-1Y&feature=player_embedded
Okay a change of plans:
Through the majority of projects before i have always gone on what looks good and unfortunately never really stuck to the brief, i feel that modelling and rigging a dinosaur will only slow me down, and weather or not the dinosaur fits in with the rest of the scene, its more about composition than about anything else! So i found this skeletal dinosaur rig on creative crash linked here
Here are some screenshots of the rig i will be using so far i've found no problems with it but fingers crossed!


This is the beginning of the jump so far! as you can see he looks very lifeless but i'm hoping to edit all of that in the graph editor later, at the moment its just a matter of getting all the characteristics down!
http://www.youtube.com/watch?v=nnxMEWPm5OA&feature=player_embedded
Okay so the step back is looking a bit more fluid now and we now have the first jump,also i put in a few more subtle head and neck movements, as i feel that if they are both still at one point then they stop looking natural
http://www.youtube.com/watch?v=FOxZue9Bd7c&feature=player_embedded
Okay i feel as though the video is coming along now, its still very robotic though, i'm impressed with the jurassic park growl though, looks like it came straight from the movie! ;)
http://www.youtube.com/watch?v=aQks7oRNFB0&feature=player_embedded
this is the final, i'm pretty happy with it, i added a few more tweaks to it such as hip movements and a tail, which i thought added quite a nice touch!
http://www.youtube.com/watch?v=cXtjUX41W3E&feature=player_embedded
TRACKING:
This is my first attempt at tracking so i literally have no idea how its gonna go, but i should probably learn so here goes!

UNEDITED FOOTAGE:
http://www.youtube.com/watch?v=uuFrtlynmrQ&feature=player_embedded
This video i have been given is actually pretty straight forward except there is a little jump at 10 secs which i will have to sought out, im also gonna have to export the dinosaur so lets see how that goes!
http://www.youtube.com/watch?v=_j5vX5q9k8o&feature=player_embedded
This is the footage with dinosaur imported, however there are two problems, one is that the city is the wrong way round and the 2nd is that i moved the city to make way for the dinosaur which will muck up the rest of the footage as everyone has moved the city central to the table!
http://www.youtube.com/watch?v=JRcL7G2gBBU&feature=player_embedded
Okay so this is the final, i've moved the city back to its central position, but decided that the dinosaur needed to be more in camera view, so it felt right to put him on a building like some godzilla/king kong type feel!
THIS IS THE FINAL OUTCOME:
http://www.youtube.com/watch?v=yVj2URJRegg&feature=player_embedded
Conclusion:
In my opinion i think things could have gone a lot better than they did, i think we spent far to long on picking an idea, and i myself feel as though i lacked motivation for this project, as well as some other members, its taught me that when it comes to developing an idea, i have to be really keen and stick to it! but its also opened up my eyes in the sense that soon i will be working on projects i might not necessarily enjoy but will have to do at the best of my ability, and thats something i definitely need to think about! i don't feel as though this project was used to its full potential but i still feel as though i've learnt quite a bit about motion tracking,compositing and it was refreshing to be involved with more after effects!